Monday 30 April 2012

Elephant No. 211: Plaster Cloth


I happened to see plaster cloth on sale in an art store this morning for only four dollars, so I figured I'd give it a try for today's elephant. I asked one of the clerks if he'd ever used it; he said no, but enthusiastically suggested that it was "Google-worthy". I took that to mean I needed to look it up online, since the package had absolutely no instructions.

Here is what I found online in the way of instructions: "Just wet it, shape it and dry it." The most detailed information I found said to use hot water, dip strips of plaster cloth in the water, affix the strips to a mould and let dry. None of this was particularly helpful to me; however, if it's so simple that it doesn't need more detailed instructions than that, I'm in!


I decided from the beginning that I wasn't interested in making a mould, so it was going to be interesting to see what could be created by shaping this stuff on itself—perhaps a collapsing pile of soggy plaster cloth. But hopefully an elephant-shaped pile of soggy plaster cloth.

Plaster cloth is exactly what it sounds like: cotton gauze, impregnated with plaster. I'm not sure if the pattern of holes is deliberate, or just a function of the manufacturing process, but it makes a very interesting fizzing noise when dunked in water.


I started by cutting a piece of plaster cloth measuring about 7.5 x 10 cm (3 x 4 inches), dipped it in water, and basically just wadded it up to make a head. The plaster sort of flakes at the start, then turns to a smooth plaster that you can mush around. I made a roundish shape, then used my fingers to smooth things out a bit. A word of warning: this material dries very quickly, making it difficult to smooth things out if you're not quick off the mark. I wasn't.


I made a body next with a piece of plaster cloth measuring about 10 x 12.5 cm (4 x 5 inches), wadding this up in the same way. I quickly attached this to the head, which was already dry to the touch, although still slightly damp. Smoothing the wetter plaster of the body into the plaster on the head seemed to make a reasonably secure join, which surprised me a little.


I made a cone for the trunk after this, cutting a piece of plaster cloth about 10 cm by 2 cm (4 x 3/4 inches), then rolling it in on itself lengthwise. I quickly attached it by smoothing it into the head on all sides, then scrunched and shaped it before it dried. I also cut a couple of strips measuring approximately 10 cm by 2 cm (4 x 3/4 inches) for ears, folded these in four lengthwise and stuck them on the head the same way.


Next I cut four strips of plaster cloth measuring 10 cm by about 1.2 cm (4 x 1/2 inches) for the legs. To form the legs, I wet each piece of plaster cloth, rolled it without too much precision, then wadded it a bit and stuck it onto the body. I smoothed the edges of the legs into the body as I had when joining the body to the head, and they stuck remarkably well.


To finish up, I cut a sliver of plaster cloth, twisted it into a tail, and stuck it onto the elephant, smoothing it into the body to make it stick.


The whole thing took me about 15 minutes, so I thought I'd try another one. I made the second one more or less the same way, the only glitch being that simple elephant figures like this have a tendency to fall on their faces because of the weight of their trunks. As a result, I had to keep building up the front legs in tiny increments, in order to tilt the elephant slightly backwards. Luckily, this material lends itself quite well to adding on little bits. It was easy to add two or three tiny wads of plaster cloth to each of the front legs until the elephant balanced. As long as I smoothed each wad into the existing leg, everything held together nicely.


One of the things I noticed was that the thicker parts of the elephant had grown quite warm, as though they were generating their own heat. I'd read somewhere that plaster expands slightly as it begins to dry, then shrinks somewhat towards the end of the drying process. Maybe that's what was going on, because they just as quickly turned cold.


These little guys are misshapen and weird-looking, but I kind of like them anyway. At this point, I could sand them, add a bit more plaster, smooth them out, paint them and so forth, but I think I'll leave them as they are for now.

This is an incredibly easy activity, and not near as messy as I expected it to be. The down side is that you need to work fairly quickly, but if you're not angst-ridden about precision and perfection, there's a certain charm to the process—and even the final product.


Elephant Lore of the Day
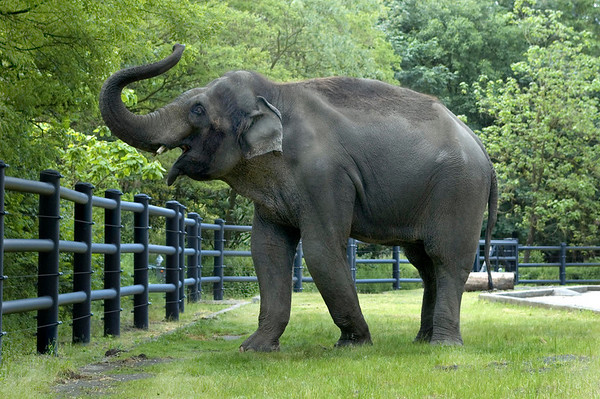
Elephants can be quite determined to exact revenge, and clearly never forget a slight. In their 1988 book, Ring of Fire, Lawrence and Lorne Blair reported on the sad tale of a Sumatran friend's cousin.

A few years earlier, the man had come across an elephant raiding his fruit garden. Perhaps not realizing that it is very unwise to anger an elephant, he wounded it with buckshot. The elephant quickly turned and chased him up a tree.

For an entire day and night, the man remained in the tree, watching helplessly as the elephant made several trips back and forth to a nearby stream. Pouring trunkful after trunkful of water on the roots of the tree, the elephant finally managed to loosen the roots enough that he could push the tree over. He promptly trampled the hapless man to death, just as a rescue party arrived on the scene.


Sumatran elephant in river, Aceh Province, North Sumatra.
Photo: David Gilbert
Source: http://ran.org/indonesia%E2%80%99s-rainforests-biodiversity-and-
endangered-species


Sunday 29 April 2012

Elephant No. 210: Printing with Plastic Wrap


I needed something simple today, so I thought I'd try printing with plastic wrap. I've never tried this before, and didn't even know if it was an actual technique, but I thought it might be interesting.

The material used in most early plastic wrap—saran, or polyvinylindene chloride (PVDC)—was discovered by accident in 1933. Ralph Wiley, a college student at Dow Chemical in Michigan, U.S.A., was tasked with cleaning the glassware used in developing a dry-cleaning solution. One of the beakers, however, wouldn't scrub clean, no matter what he tried. He dubbed the coating "eonite", after an indesctructible substance in the Little Orphan Annie comic strip.

Dow researchers analyzed the substance, and by 1939 Wiley's boss John Reilly and his team had developed a greasy, dark green film they called "Saran"—named for John Reilly's wife and daughter, Sarah and Ann. Virtually impermeable to water and oxygen, the original material was sprayed on fighter planes during the Second World War to prevent damage from sea spray, and used in automobile upholstery.


Saran plastic was once used in the automotive industry.
Source: http://tatteredandlostephemera.blogspot.ca/2011/05/saran-plastic-seat-covers.html


Following the Second World War, Dow got rid of Saran's green colour and unpleasant smell and developed a way of extruding the material into thin, flexible sheets. By 1949, an early form of Saran wrap was available for commercial use, followed by a food-grade product in 1953.

Interestingly, PVDC was also developed into ventilated insoles for tropical combat boots. The first PVDC insoles were used in 1942, and remained a staple of American military gear until the mid-1970s, when they were replaced by a form of urethane. The British Army, however, continues to use Saran insoles in its boots. Saran is also used to this day for high-quality doll hair, which is valued by collectors for its softness, shine, and ability to hold style and curl.

Today, plastic wrap is made either of PVC (polyvinyl chloride) or LDPE (low-density polyethylene). The name "saran", although originally a trade name, is often used as a generic description. Similarly, plastic wrap is known in Australia by the generic "glad wrap", also originally a trade name. Other common names for the material in various parts of the world are "cling film", "cling wrap" and "food wrap".

As an art medium, plastic wrap is sometimes used to give textures to walls and other surfaces, by balling up plastic wrap, dipping it in paint and dabbing it across the surface. Another way of using plastic wrap appears to involve covering a surface with paint, placing a sheet of plastic wrap on top, then removing the plastic to create a random design. I decided to try something like the first option, using it to create a representational image rather than a simple textured background.

For today's elephant, I used a sheet of artist-quality bristol board, some acrylic paints, and a small piece of plastic wrap.

The method I chose was simple: wad up the plastic wrap, dab it into some paint, remove a bit of the paint by stamping it a couple of times into the palette, then print a design on paper.


I didn't bother drawing anything ahead of time, deciding I'd rather wing it and see what the technique produced on its own. The photograph below shows my first daubs with purple. It looks a little like sponge painting, but has a much softer edge.


After this, I added red:


Then I more or less forgot to photograph the process, but the two photographs below show what the palette and plastic looked like when I was finished with the first elephant. Because of the type of design I was creating, I didn't remove paint from the plastic before dipping it into another colour. To a certain extent, most of the paint comes off when you stamp it into the paper anyway.


And this is what the first elephant looked like when I was done:


This had only taken me about ten minutes, so I decided to make another one. I totally forgot to photograph the process for the second one, but the photographs below show some details of the paint. To create finer lines, as in the trunk, I used the side of my little wad of plastic.


I quite enjoyed the process, and I liked the effect much more than sponge-painting. Because the plastic wrap doesn't absorb the paint, the colours hit the paper in a more liquid state, and are more saturated as a result. It was also very easy—which is always good, particularly on a hectic day.


Elephant Lore of the Day
This slightly crazy—and very sad—story comes from the heyday of LSD experimentation on humans and animals. In 1962, three men at the University of Oklahoma decided to inject an Asian bull elephant with LSD, hoping to induce musth. Musth is a naturally occurring condition during which male elephants experience a spike in sex hormones, making them violent, aggressive and uncontrollable.

Tusko was a relatively small bull elephant weighing a mere 3.2 tonnes (7,000 lbs). Five minutes after he was shot in the right haunch with a massive 297-mg dose of LSD, Tusko trumpeted wildly, collapsed, and went into convulsions. Twenty minutes after the initial injection, the team administered thorazine in an attempt to help Tusko. Tusko remained in distress. An hour later, in a further attempt to revive Tusko, he was injected with pentobarbital sodium, this time directly into a vein. He died a short time later.

Following Tusko's death, controversy arose over the way in which the experiment had been conducted, as well as the very fact of attempting such an experiment in the first place. For one thing, the LSD dose was massive, based on the obviously mistaken assumption that an elephant would be resistant to the drug's effects. In fact, a more appropriate dose to induce an LSD "trip" in an elephant would have been 9 mg—which is nowhere near the 297 mg Tusko received. In addition, the weird cocktail of drugs administered to revive Tusko—which may have included others not recorded—had only made the poor creature's distress even worse.

The lead scientist in the experiement, 29-year-old Dr. Louis Jolyon "Jolly" West, was chairman of the Department of the University of Oklahoma at the time, and was known for his experiments with LSD. An unsubtantiated rumour suggested that he had ingested LSD himself shortly before injecting Tusko, and may have been under the influence the whole time. Even more bizarrely, West later issued a report advancing his "discovery" that LSD could be used as an effective means of culling of elephant herds in Africa.

West also used the notoriety surrounding the experiment as a means of ingratiating himself with the LSD subculture of the 1960s. Even as late as the 1990s, he was trading on his reputation as the man who had killed an elephant with LSD, joking about how the experiment had allowed him—a nerdy scientist with a crewcut—entrée into the world of hippie artists and psychedelia.

It was a strange experiment for a man who otherwise seems to have had a strong social conscience. West was active in the civil rights movement, and was the first white psychiatrist to testify for Black prisoners in South Africa during early attempts to end apartheid.

Little else is known about the unfortunate Tusko. Although he was billed as "the pride of the Oklahoma Zoo" at the time of the experiment, subjecting him to such an experiment seems highly risky for such a valuable animal.


Rama, a male Asian elephant at the Oregon Zoo.
Source: http://oregonzoo.smugmug.com/Animals/Oregon-Zoo-Photos/3268430_
6T56N7/181132214_rDCU5#!i=181132214&k=rDCU5


Saturday 28 April 2012

Elephant No. 209: Silk Fusion


A couple of months ago, one of the women in my fibre arts guild showed us a beautiful little bag made with a process called silk fusion. I had never heard of this before, but Jean assured me that it was easy.

From the tutorials I saw online, silk fusion appears to be very similar to wet felting with wool. The main difference lies in the need for a glue-like binding agent, since silk fibres don't bind to one another the way wool fibres do. The result is a sort of non-woven fabric like interfacing, albeit much prettier.

Fibre artists rarely use the resulting fabric as an art piece in and of itself. Instead, they usually seem to take the piece of silk fusion and cut it up to use in larger two-dimensional works, or form it into shapes such as boxes and pouches.


Silk fusion vessel by Suzanne Carmichael.
Source: http://fibercollege.wordpress.com/2009/07/16/suzanne-carmichael-
will-teach-silk-fusion-this-year/


The process is quite straightforward, and there are a couple of good tutorials online. I used a tutorial by Sue Bleiweiss, although I had to adapt it to available materials.

Right off the bat, I didn't have the proper kind of silk. The process calls for fluffy soy or tussah silk fibres, which look like this:


Raw silk in the Suzhou No 1 Silk Mill in Suzhou, China.
Source: http://en.wikipedia.org/wiki/File:Silk_raw_01a.jpg

I had this:


This type of silk is known as a "silk hankie"—and is essentially a stack of thin filamented silk, compressed into a square. When presented with this at one of the city's best fibre stores, I politely said that I didn't really want a silk handkerchief; I wanted a hank of raw silk. I patiently explained what I was trying to do, and received an equally patient description of how these silk hankies are used to produce silk fusion. I'm sure I must have still looked vaguely confused, because I was then assured that, if I pulled it apart, it would look just like raw silk.

Well, it sort of does. A little. Maybe if I'd carded it or something. One thing I found quite interesting is how far it stretched without actually separating from itself. I think I could have pulled this around my entire house if I'd had a mind to. Given that each hankie (and there are at least 20 of them in this thin stack) consists of one cocoon, there would be about a mile of filament in each. And silk fibre is pretty unbreakable.

This is what one silk hankie looks like when pulled apart (then pulled apart again and again):


This would work for the base, but now I had to find something to use for the elephant design. Normally it should be something as fluffy as the white silk above, but that would mean dyeing things, and I hate dyeing. Also, I couldn't dye and dry a bunch of colours in a single day, as well as make a piece of silk fusion. So I bought this:


Truth be told, I probably bought it because it was pretty, rather than practical. (It's a good thing I don't like shoe-shopping.) The person at the fibre shop said it might work, but that it wouldn't be something I could easily card to make it fluffy. I was beginning to worry about how well this little venture into silk fusion was going to go.

The other two things I needed were something called "textile medium" and some fine tulle. Certain I had tulle somewhere in the house, I concentrated on trying to find textile medium. I finally found something at a craft store with the words "textile medium" on the label, but it appeared to be a substance you use to make acrylic paint work as a fabric paint, so I had no idea if it was going to work for silk fusion.


So, to recap, the supplies I needed were:

Silk fibres—yes, but with reservations
Textile medium—yes, but with reservations
Tulle—yes
Liquid dish soap—yes

I started by following the tutorial instructions and laying out a layer of white silk fibres in a horizontal direction. Dealing with the white silk fibres was by far the most annoying part of this activity. Because the silk is essential the same as a spiderweb, it sticks to everything: itself, the tulle, and especially my slightly dry hands. I actually had to moisturize my hands twice to keep it from driving me completely crazy.

Worse still is when it sticks to itself, because the finest filament has a tendency to latch onto another fine filament, and pull it out of place. This wasn't a big deal when I was laying out white on white, but it was definitely a big deal when I was laying out colour at various stages.

The photograph below shows my first layer. I added a piece of green foam underneath so that I could get a feel for how thick a bed of silk I had. My feeling was that it should be thick enough that there was more white than green when I looked down.


I decided that it was too plain and, not knowing how opaque the silk would be with this thickness of white, I threw on a few random silk fibres. The idea was to make the background less blank. I discovered, however, that silk is not like wool. It is actually quite translucent, so the final piece ended up being a bit more "riotous" than I had expected.


After these bits of colour, I laid a vertical layer of white silk fibre. It was now more or less ready for me to add the elephant.


I started with a light hand, knowing it would be virtually impossible for me to pluck errant coloured strands off the white without surgical instruments.


It was quite fiddly to place the colour in a recognizable pattern, because the coloured fibres also snagged the white, then themselves, then the white again, pulling things all over the place. I managed to poke things back into place with a metal skewer—metal, because heaven knows what a bamboo skewer would have snagged and dragged.

When I was finished with the elephant—or, to be more precise, when I had had enough—I flung a few last bits of white over the elephant. My thinking was that the fluffy silk might bond better to itself and help the more shiny processed silk stay in place. Later I realized that it doesn't matter: the textile medium is what keeps things in place.


I now had a fluffy oblong of silk measuring nearly 2.5 cm (1 inch) in height. The next step is to saturate this blanket of fibres with a mixture of water and dish soap. The whole thing should be wet all the way through, because this helps the textile medium to bond the layers together.

After the silk was dampened enough to become somewhat translucent, I soaked up some of the excess water with a rag or paper towels so that it wasn't completely sopping wet. I was a bit concerned to see dye coming away on the paper towels, but this was just a test piece, so if the colours ran it didn't really matter.

The final step in the processing part of this activity is to paint each side with a thin layer of textile medium. Turns out this stuff is the right material to use. This means that, if you want to try this and can't find something specifically labelled "textile medium"—but you do find something that allows acrylic paint to be used as fabric paint—that will work, too. In fact, I found my textile medium hiding (literally) in the aisle that carried acrylic paint, rather than with textiles, glues or acrylic medium.


Once the textile medium has been painted on, the piece needs to dry completely. To do this, you keep it sandwiched in the tulle, because the piece is very fragile at this stage and will do weird things if you try to peel away the tulle too soon. (We won't ask how I know that.)

The sandwiched piece should then be hung up somewhere. The tutorial said it needs six to twenty-four hours to dry. I decided it could have two or three, so I hung mine outside by clipping it to a plastic coat hanger. I was careful to clip the tulle rather than the silk, so as not to mark the silk. You don't need to worry about the silk falling out of the tulle when it dries.

Once it was thoroughly dry—which took 2-1/2 hours on a breezy, sunny, but 5˚C (41˚F)  day—I carefully peeled away the tulle. You can see how the dyes ran when it was hung up to dry.


The final step involves ironing the whole thing to set the medium and make it somewhat permanent.

This took me about an hour from the time I started to the time it was ready to hang outside to dry. A lot of that time, however, was spent peeling cobwebby silk from my hands, and poking snagged fibres back into place. In the end, it's really not difficult at all. The hardest part, in fact, was finding the materials.


The final piece feels a bit like handmade paper, and some of the coloured fibres in the middle of the elephant's head aren't completely glued into the surface, but I'm not unhappy with it as a first attempt. I would probably be much bolder with colour next time, and perhaps rely less on the frustrating white silk fibre, now that I know that the medium is what really  holds it together.


Elephant Lore of the Day
Earlier this month, NASA released the image of lava flood on Mars that looked decidedly like an elephant. The photograph was taken by the High Resolution Imaging Science Experiment (HiRISE) on NASA's Mars Reconnaissance Orbiter.

The image shows a region of Mars called the Elysium Planitia, which is the planet's youngest "flood-lava province", thought to be somewhere between two and ten million years old. Scientists aren't sure if most lava flows on Mars were deposited quickly or over a period of time, although they believe it was probably over a period of years or decades, as is the case here on Earth.

Flood lavas like this elephant, however, are deposited quickly, similar to floods of water. As Arizona planetary geologist Alfred McEwen commented, "An elephant can walk away from a slowly advancing flow front. However, there is also evidence for much more rapidly flowing lava on Mars—a true flood of lava. In this instance, maybe this elephant couldn't run away fast enough."


Elephant-shaped lava flood on Mars.
Photo: NASA/JPL/University of Arizona
Source: http://www.space.com/15207-mars-lava-elephant-mro.html


Friday 27 April 2012

Elephant No. 208: Cubomania


Today feels like a Surrealist day, so I thought I'd try cubomanie—also called "cubomania", which to me sounds more like a boardgame than an artistic practice.

Cubomania is a form of collage, in which one or more pictures is cut into squares, with the squares then reassembled in a sort of fugue state to create a new image. Usually the image is meant to be random and subconscious, but there is another strain of cubomania that allows for the rearrangement of the squares as you choose. How convenient for me.

Cubomania was first used by Gherasim Luca, a Romanian Surrealist poet and theorist. He invented the technique with artist Dolfi Trost, and is credited with forming a Surrealist artist coalition in Romania, just prior to the Second World War. He later fled Romania for Paris, where he often collaborated with French Surrealists such as Max Ernst and Jean Arp. In 1994, expelled from his apartment at the age of 80, he committed suicide by jumping into the Seine.


Indochine, 1960
Gherasim Luca (1913–1994)
Source: http://www.mutualart.com/Artwork/INDOCHINA/
AE27F830A7FB440B


Cubomania is usually done, as the name suggests, with squares, although at least one cubomania work has been made with triangles. It is also sometimes seen as a political statement, since the recombined image can be used to "subvert the enslaving message" of advertising and "free images from repressive contexts." Er, okay.

Using cubomania to arrange soundscapes has also been suggested. I wonder if that would sound any worse than my music composition elephant.

For today's elephant, I decided to be political and subvert a bunch of magazine images. Also, I didn't feel like printing out elephant images to cut up. These are the pages I chose, ripped from a couple of glossy magazines destined for the recycling bin. I chose images with large blocks of colour and minimal words.


To cut them up, I trimmed off the edges with a tabletop rotary cutter, then cut them into 1.2 cm (1/2-inch) squares. I thought about 2.5 cm (1 inch squares), but to get any kind of recognizable elephant, I thought I probably had to go smaller. For backing, I used a 28 x 35.5 cm (11 x 14-inch) sheet of artist-quality bristol board.


I started by laying out a few squares, then realized I needed a bit of a sketch to guide this whole process.


I generally chose the squares based on tone, although colour also played a role. I didn't really care what was pictured in the square, although I seem to have chosen primarily squares with very little obviously recognizable image. I don't know if that's a good or bad thing to a cubomania purist.


As I went along, I ran into difficulties with uneven squares. I tried to use this to my advantage by leaving a bit of white space around everything. In the end, however, I rather liked the eccentricity of the shapes. It probably appeals to my inner anarchy or something.


As you can see from the closeups below, I chose things mostly based on whether I instinctively liked the way they looked. I suppose that's somehow related to the original Surrealist concept, although I would hesitate to claim that this is a work of proper cubomania.


This is a very easy process, if a bit time-consuming. It took me about half an hour to cut up the squares, and it took about an hour and a half to glue everything down. If you made bigger squares it would obviously be faster, and if you weren't trying to make something representational, it would also be faster. But I'm pretty happy with this first attempt at cubomania, and may even try it again sometime.


Elephant Lore of the Day
One of the funnier stories about elephant behaviour comes from the David Sheldrick Wildlife Trust. According to Daphne Sheldrick, a young male elephant called Olmeg began suddenly having tantrums when it came time to wean him.

Every day, little Olmeg would pitch a fit, but no one could figure out why. It turns out that he had noticed that the other orphan elephants—not yet ready for weaning—were receiving four bottles of milk, while Olmeg was only receiving three. He could count well enough to feel that he was being cheated, and began behaving like a spoiled brat.

The problem was solved when Ms. Sheldrick was called in. Knowing that it is very important to treat all elephants alike, she suggested that keepers fill a fourth bottle with water for Olmeg. When Olmeg was fed alongside the other babies, he saw that he now had four bottles lined up as well, and the tantrums stopped.


Olmeg at 18 months, October 1988.
Source: http://www.sheldrickwildlifetrust.org/asp/
orphan_gallery.asp?Rhino=&N=25