
I've been thinking about doing a linocut elephant for a couple of weeks, but I've been avoiding it. My last—and only—experience with linocut many years ago made me pretty sure I'd never want to do it again.
Linocut involves, as the name suggests, carving into a piece of linoleum. Based on the woodcutting technique that preceded it historically, linocut involves incising a design with a V-shaped gouge. The raised area obviously becomes the printing surface. Once the design is ready, ink is rolled onto the linoleum, then pressed onto a piece of paper or fabric. The imprint can either be made by hand, or with a press.

Linoleum as a floor material dates back to the 1860s, although it wasn't used as a printing medium until sometime between 1905 and 1913, when the Die Brücke company in Germany produced linocut wallpaper. To make the production method sound more respectable, they labelled their wallpaper "woodcut", rather than "linocut".
Linoleum is obviously much easier to carve than wood, and has no grain to deal with. It can also be used to print multiple colours. One way of doing this is to produce separate plates that will be printed in succession. The other way is something called the "reductive" method, used by Pablo Picasso and others. This method involves printing one colour with the plate, removing it, cleaning it, then carving away everything that you don't want printed for the next colour.
 |
| Picador et Torero, 1959 Pablo Picasso (1881–1973) Source: http://en.amorosart.com/artwork-picasso- picador_et_torero-6327-en.html |
The only time I tried linocut was in high school art class, with an actual piece of brown linoleum. The teacher was very enthusiastic, but I hated the process. Carving into linoleum, no matter how sharp the tool, is actually quite difficult. Curved lines are hard to achieve, and the tool can slip, gouging the linoleum where you don't want it gouged, and often gouging your hand as well.
Luckily, we now have soft rubber "lino" plates to use. Although these aren't cheap, they're so much easier to carve. I actually enjoyed carving this stuff, and I usually don't enjoy carving anything—not even roast beast.

The first thing I did was sketch something onto the rubber plate. For me it would be the height of stupidity to try carving something on the fly. There are two things to remember at this stage. The first is that your design will be the mirror of what you draw. I can't believe I forgot this again. The second is that you need to think about what areas you want to print, and what areas you don't, and plan accordingly while drawing. There would be nothing worse than carving away an area, then realizing you'd meant that part to print.

As some of you may have guessed by now, I don't like instructions unless I'm utterly clueless about a process. Not knowing how this is supposed to be done, I decided I would carve the fine lines first, in a sort of outline. I don't know if that's the right way to go about it or not, but it seemed to work well enough for me.

Once I had some lines incised around the edges of everything, I started carving away the background. The main thing to remember here is that, if you want some of the carving lines to show in the background, pay attention to how you're carving them—for example, carve them into patterns or all in the same direction, or whatever. And if you don't want the lines to show, carve deeply enough that they won't remain near the surface.


When I'd carved away the bulk of the background, I went back in to clean up the edges. I also tried to ensure that the areas I didn't want to print were deep enough to keep from picking up the ink.

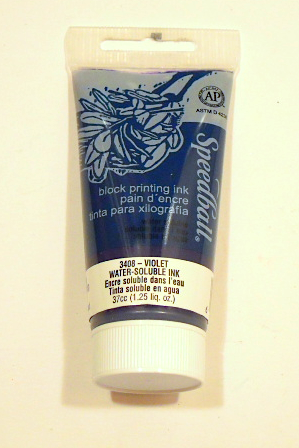
The next stage is to ink the plate. You do this simply by squirting some block printing ink onto a pie plate or something, rolling over it with a brayer, then rolling it onto the printing plate. It's important to make sure that the ink goes on fairly uniformly, that it's not glopped on anywhere, and that it covers the entire design.


The first time I printed, I put the plate onto the paper. It slid around a bit, which annoyed me.

The next time, I put the paper on top of the plate and gently smoothed it down. This made a nice crisp print, but I couldn't see what I was doing. Luckily, the paper was big enough that it didn't really matter; I can trim it later. If you try this, just experiment to see what works best for you.
With this second print, some of the background carving lines were still too close to the surface, so they printed. If I had more of them, I might have kept them, but I didn't like the way this looked, so I carved them away. Obviously, when there's ink on them, it's easy to see where they are.

I cleaned the plate, inked it again and made a final print, again by laying the paper on top of the plate. This one worked perfectly. My only disappointment was that, when I cleaned the plate, it split down the middle, so I'm not sure it can be used again.
I liked this process a lot. It was easy, didn't take long, and I'm very happy with the result. Even better, no linoleum was involved in this particular linocut.

Elephant Lore of the Day
One of the most traditional and widely used design motifs in Turkmen carpets is the "elephant foot". Octagonal in shape, the elephant foot is usually knotted against a red background.
The elephant foot pattern is common to carpets produced in Turkmenistan, and in Afghanistan by Turkmen weavers—particularly those produced by the Ersari people. No one is quite sure how the elephant foot design evolved, given that elephants are very thin on the ground in a northern country such as Turkmenistan. It is believed that the pattern may have been adapted from motifs that originated in India, coming to Turkmen artisans via long-ago trade along the Silk Road.
 |
| Ersari gulli-gol or "elephant foot" motif in a Turkmen carpet. Source: http://www.tcoletribalrugs.com/article35Moshkova.html |
To Support Elephant Welfare
World Society for the Protection of Animals
Elephant sanctuaries
(this Wikipedia list allows you to click through to information on a number of sanctuaries around the world)
Performing Animal Welfare Society
Zoocheck
Bring the Elephant Home
African Wildlife Foundation
Performing Animal Welfare Society
Zoocheck
Bring the Elephant Home
African Wildlife Foundation
This blog aware me about different programs which can become very useful for our friends and kids. Few websites provide combined courses and few of the are separately for single subject. Glad to get this information. Gym Weights
ReplyDelete